
Looking for an easy way to update your Google Analytics code on your website? Google Tag Manager is a free tool that allows you to easily add or update your Analytics code (or tags) with just a few clicks without having to edit your website code. In this article, we’ll show you Google Tag Manager setup with Google Analytics.
What is Google Tag Manager and Why Do You Need It?
Google Tag Manager is a free tool that lets you easily deploy different types of tracking code (or tags) including event tracking, conversion tracking, remarketing and more without needing to edit your website code.
For instance, if you want to track file downloads on your site, you’ll have to enable event tracking and manually update all the download links for it to work unless you’re using MonsterInsights, the best Google Analytics plugin for WordPress.
With Google Tag Manager, you can deploy various types of tracking code on your site, including Google Analytics.
An Alternative Method to Tag Manager
The downside to using Tag Manager to deploy various types of tracking code is that there exist a learning curve if you’ve never used it before.
The MonsterInsights plugin is the right choice if you’re after an easier alternative to setup Google Analytics.
MonsterInsights is the best Google Analytics plugin for WordPress. It allows you to setup Analytics right from your WordPress dashboard, so you don’t have to log into any third-party site or mess with various tracking codes.
MonsterInsights makes it super easy to setup Google Analytics for beginners and seasoned professionals alike. The core plugin comes with every essential feature you’ll need for your site, including an analytics dashboard so you can view your analytics right in WordPress.
You can also extend and enhance the functionality of MonsterInsights by installing addons, including:
- eCommerce Tracking: easily track your WooCommerce or Easy Digital Downloads store
- Ads Tracking: See who’s clicking in which ads on your site
- Custom Dimensions: Track authors, categories, tags, and more
- Forms Tracking: See stats on all your WordPress form views and conversions
- Google Optimize: Easily enable Google Optimize for easy split testing
- Google AMP: Get accurate analytics on your AMP-enable pages
…and much more. You can read how to set up Google Analytics with MonsterInsights.
If you still prefer going with Google Tag Manager, you can follow the below tutorial.
Implementing Google Analytics With Google Tag Manager
The first things you need to do is to sign up for Google Tag Manager.
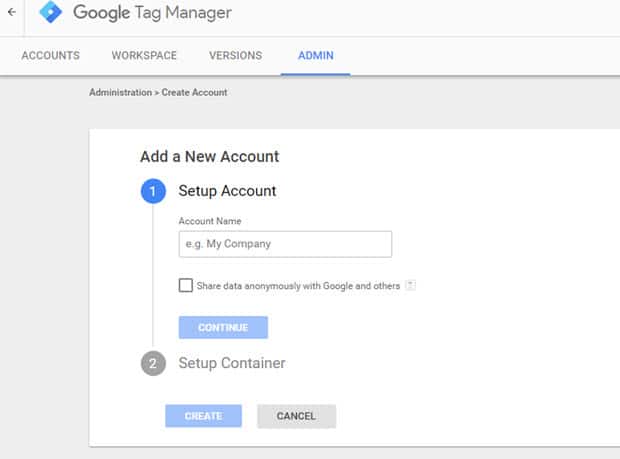
Then add a new account by entering a preferred account name to your Account Name field. Click Continue.
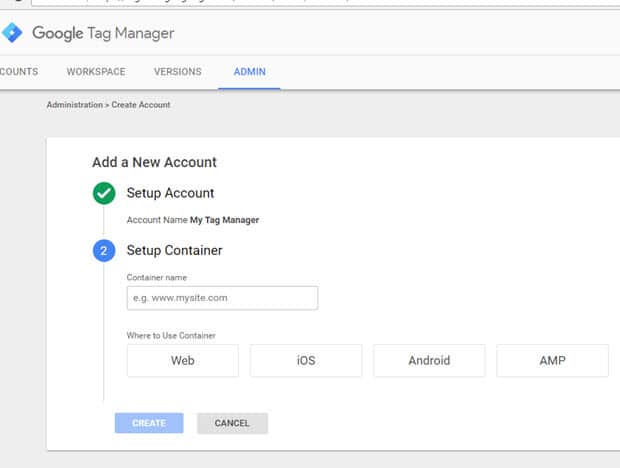
In the Setup Container step, you can enter your website name as the Container name. Under Where to Use Container, choose Web and then, click Create.
Now you’ll be asked to agree to Terms of Services of Google Tag Manager. Click Yes. Then you’ll be given a tracking code snippet to copy onto your site. Copy it and paste it onto the header.php of your WordPress site. You can check out this guide on how to copy paste code snippets in WordPress.
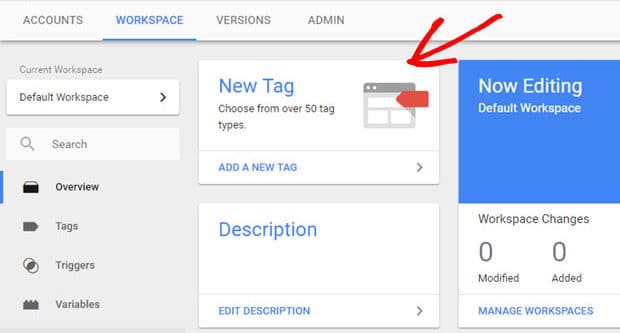
Then click New Tag.
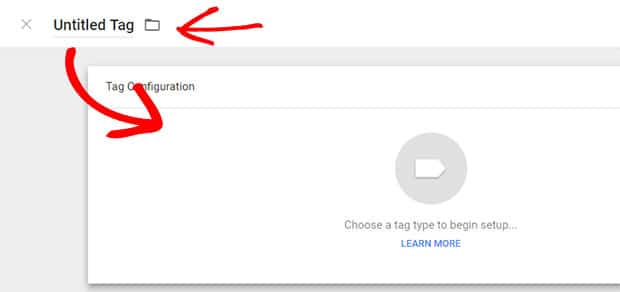
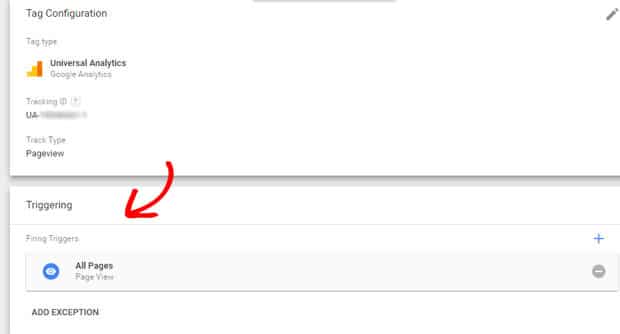
You can rename the tag by clicking on the Untitled Tag field. Then click on the big icon where it says choose a tag type to begin setup. Then click Universal Analytics.
You’ll need to enter Tracking ID and Tracking Type. You can learn how to find your Analytics tracking ID. For the sake of this example, let’s choose Pageviewas Tracking Type.
Click on the big icon where it says choose a trigger to make this tag fire. For a basic Google Analytics implementation, select All Pages.
That’s it!
You’ve successfully implemented Google Analytics with Google Tag Manager. Your Google Analytics tag will execute on every page.
We hope this tutorial helped you to implement Google Analytics with Google Tag Manager successfully.
If you’re looking for an easier way to implement Google Analytics on your WordPress site, see our guide on how to properly setup Google Analytics in WordPress.


No comments:
Post a Comment